you could use vmware to run a virtual machine inside vista.
or
Dual Boot Windows 7 with XP/Vista in three easy steps
By Matthew DeCarlo on January 20, 2009
Editor: Julio Franco
Write / Read user's feedback
 Bookmark / Share This
Find software prices
Bookmark / Share This
Find software prices
Now that
[COLOR=#05408F ! important][COLOR=#05408F ! important]Microsoft's[/COLOR][/COLOR] latest operating system,
Windows 7 (beta) is publicly available, almost everyone is itching to get their grubby paws on a copy and take it for a test drive. However, because this is only a beta release most people simply aren't willing to part with their established installations of Windows Vista or XP. With that mind, we're going to look at one easy way of dual booting Windows 7
[COLOR=#05408F ! important][COLOR=#05408F ! important]Beta[/COLOR][/COLOR] with either Vista or XP in three painless steps...
Step 1:
Create an Installation Disc
In case you haven't downloaded your copy of Windows 7 Beta yet, you can get it now in
32-bit and
64-bit flavors. You can read further instructions and get your installation key from
Microsoft's website.
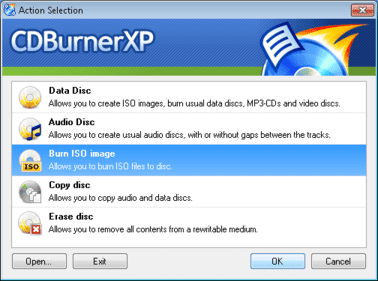
Once you obtain your copy of Windows 7 (the official release is an .ISO file), you will need to burn it to a blank DVD to continue.
There are countless applications out there which will burn image files, to name a few popular free ones:
Burn4Free CD and DVD,
CDBurnerXP,
ImgBurn and
Ashampoo Burning Studio Free. I used CDBurnerXP.
Step 2:
Create a New Partition
Moving on to more pressing matters, we'll need to create unallocated disk space by resizing an existing partition followed by creating a new partition on this unallocated disk space where Windows 7 will call home. I imagine a majority of you will only have one partition, which is dedicated to whatever operating
[COLOR=#05408F ! important][COLOR=#05408F ! important]system[/COLOR][/COLOR] you're currently using.
To complete this task we'll be looking at two different approaches because while Windows Vista has built-in tools to resize active partitions, XP does not, and thus we must resort to a third party application (GParted).
Create a New Partition on Windows Vista
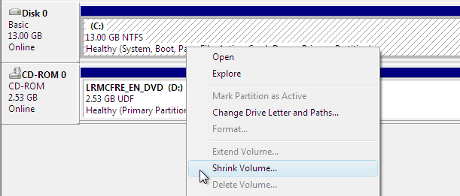
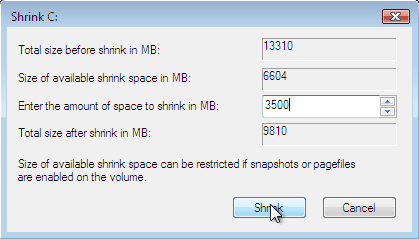
Before we get started, if for any reason you prefer to use the GParted alternative detailed below, feel more than welcomed to do so. In Windows, click the Start button and enter "diskmgmt.msc" into the search bar. This will open a window titled "Disk Management" displaying basic information about the drives attached to your PC. Right click the partition on "Disk 0" and select "Shrink Volume".
This should present you with drive capacity information and the option to enter the amount you would like to "shrink" your partition by. The recommended minimum partition size for Windows 7 is 16GB, so enter an amount of that size or larger and then click "Shrink".
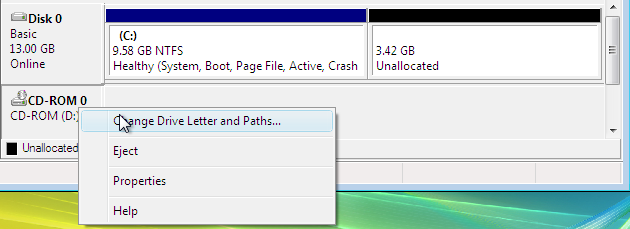
You should now see unallocated space on your hard drive in the capacity specified, situated just after your resized partition.
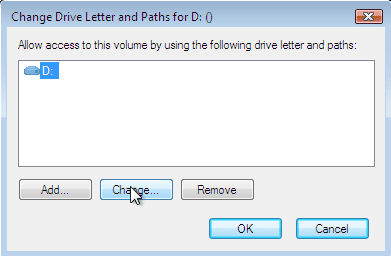
Before you create a new partition and assign a letter to it, be a perfectionist and reassign your optical drives to the next letter down from what they are now, so that your new empty partition can have whatever letter follows your first partition (probably "D").

Right click the newly unallocated space and select "New Simple Volume..." which ought to open a wizard screen.

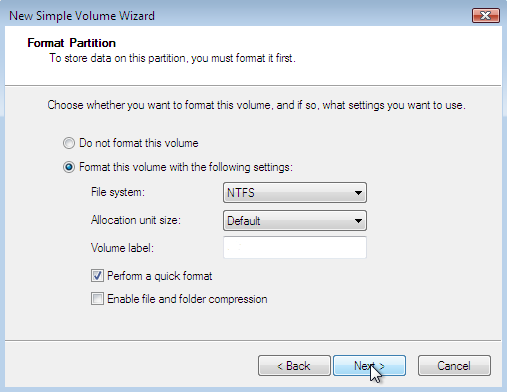
On your way through the wizard you'll be asked to define the capacity for your new volume. Let it occupy the entire size of the unallocated space and assign it the letter that you've just freed. Quick format the volume using the NTFS file system and default allocation unit size (Volume label can be anything, just name it Windows 7).

You should now see a healthy primary partition with the capacity and label you had defined, and with that you can move onto step 3.
Create a New Partition on Windows XP
This process is fundamentally the same as the above, but using the third-party tool GParted instead of the integrated Disk Management utility in Vista. Needless to say, this is the route XP users will have to take. Download the latest copy of GParted and then burn it to a disc just like you did with the Windows 7 .ISO, except GParted can be fit on a CD.
After you've burned your image of GParted, pop it in your optical drive and reboot. Shortly after booting off the disc you'll see a dialog for choosing your preferred language, keymap and screen resolution.
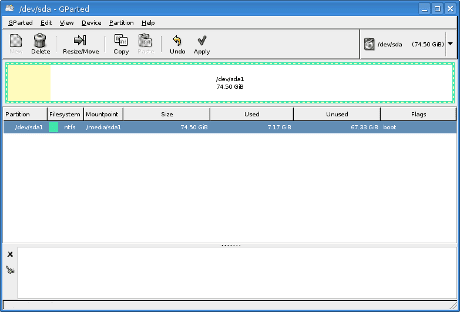
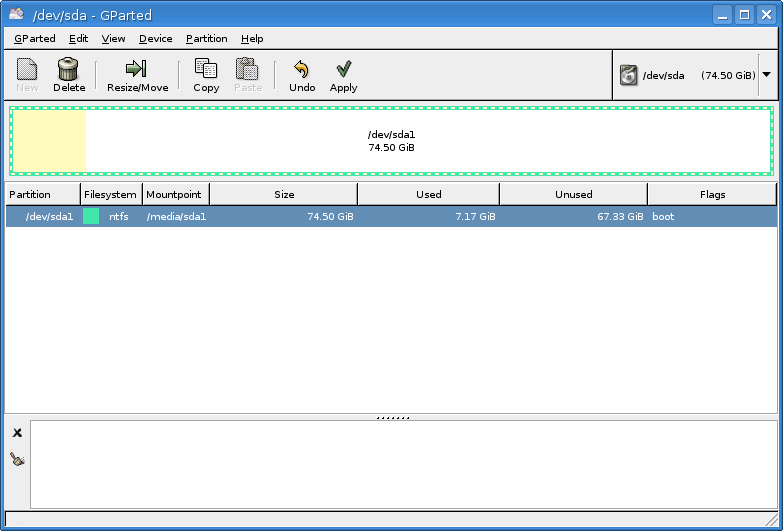
Once the software has loaded, right click the partition you're going to resize - again, you probably only have one and it's likely on "dev/hda1" - and select "Resize/Move".
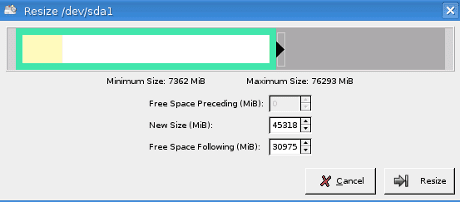
This should present you with drive capacity information and the option to enter a new size you'd like your partition to be. The recommended minimum partition size for Windows 7 is 16GB so opt for that size or larger.
You should now see unallocated space on your hard drive in the capacity specified, situated just after your resized partition.
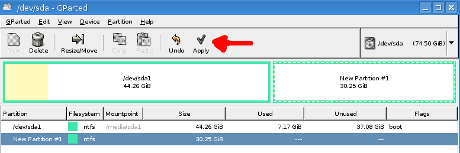
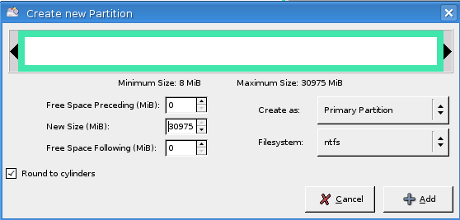
Right click the newly unallocated space and select "New", which ought to open a window requesting the amount of free space you'd like preceding and following the new partition as well as the new partition size. Fill in zeros for both the preceding and following free space in order to occupy the entire unallocated space. Create it as a "Primary Partition" and format it using NTFS.

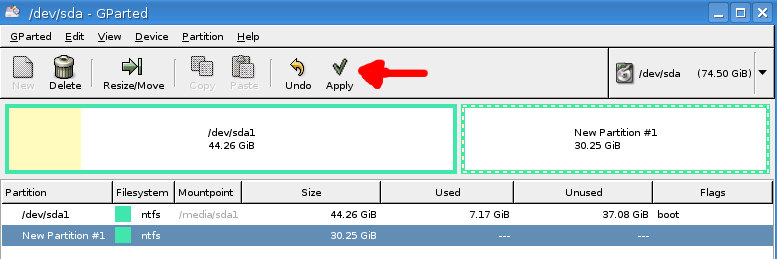
You should now see a healthy primary partition with the capacity you defined above. Click Apply to initialize the operation. Once that's done you can now move on to step 3.
Step 3:
Install Windows 7
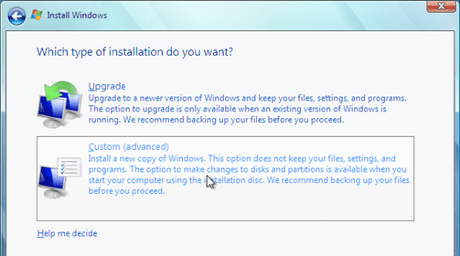
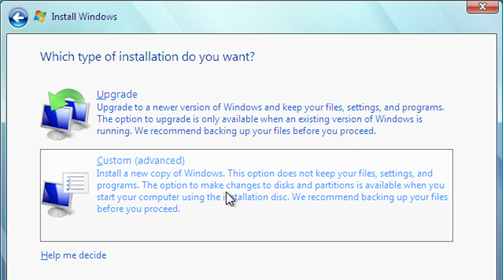
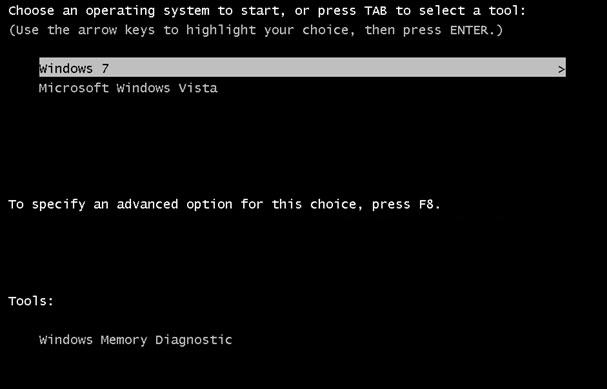
With the Windows 7 DVD in your optical drive, reboot and "press any key" to boot from the disc when prompted. The installation wizard that you'll meet is pretty straightforward for the most part. The only thing worth noting is that during the process make absolutely sure that you choose the "Custom (advanced)" installation option so you're able to select the fresh partition created above, and be careful, you run the risk of installing over your old operating system along with all of your data if you select the wrong partition.
After defining all configuration parameters Windows will continue with the installation process for roughly 15-30 minutes and then prompt you to set up your account, provide a key and set up Windows.
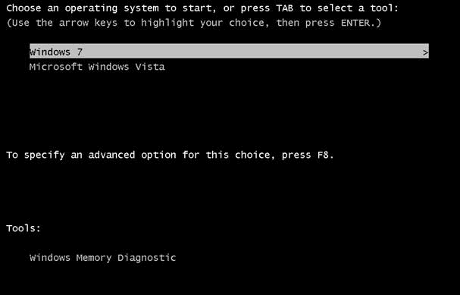
Pat yourself on the back! You've successfully installed Windows 7 alongside your previously existing instance of Windows and you'll be able to
check out all the buzz you've heard about Microsoft's latest operating system.
Troubleshooting Tips:
Make sure you shutdown/reboot your PC from within Windows cleanly if you're having issues when attempting to alter your partition with GParted.
Can't boot off the GParted or Windows 7 discs? Take a look in your
[COLOR=#05408F ! important][COLOR=#05408F ! important]BIOS[/COLOR][/COLOR] to ensure that your boot sequence is configured properly. You'll want the optical drive to take precedence over your hard drives so you can boot off the CD.
Update: We've recently posted a follow up guide that shows you
how to remove your Windows 7 installation and partition, should you wish to delete the Beta OS from your hard drive.


") Admin/Mod ---> Solved XD
Admin/Mod ---> Solved XD