How to Add "System Properties" to Computer Context Menu in Vista
This will show you how to add System Properties to the Start Menu Computer (My Computer) context (right click) menu in Vista.
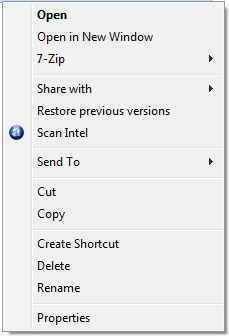
Normally you would have to either open the Control Panel (Classic View) and click on the System icon or right click on the Computer button in the Start menu and right click on Properties, then click on the Advanced system setttings link to open the System Properties window. (See screenshot below)

NOTE: This is what will open when you click on the System Properties context menu item below when added and click Continue for UAC prompt.

EXAMPLE: Start Menu Computer context menu Before and After System Properties added

 OPTION ONE
1. To Add System Properties
A) Click on the Download button below to download the file below.
Add_System_Properties.reg

B) Go to step 3.
2. To Remove System Properties
A) Click on the Download button below to download the file below.
Remove_System_Properties.reg
3. Click on Save, and save the .reg file to the Desktop.
4. Right click on the downloaded .reg file and click on Merge.
5. Click on Run, Continue (UAC), Yes, and then OK when prompted.
6. When done, you can delete the downloaded .reg file if you like.
OPTION TWO 1. Open the Start Menu.
2. In the white line (Start Search) area, type regedit and press Enter.
3. Click on Continue in the UAC prompt.
4. In regedit, go to: (See screenshot below)
Code:
HKEY_CLASSES_ROOT\CLISD\{20D04FE0-3AEA-1069-A2D8-08002B30309D}\shell
5. To Add System Properties
A) In the left pane, right click on shell and click on New, then Key. (See screenshot above)
B) Type System Properties and press Enter. (See screenshot below)
C) In the left pane, right click on System Properties and click on New, then Key.

D) Type command and press Enter. (See screenshot below)
E) In the right pane, right click on (Default) and click on Modify.

F) Type Control sysdm.cpl and click on OK. (See screenshot below)
NOTE: This file is located at C:\Windows\System32\sysdm.cpl if you wanted to create a shortcut for System Properties.

G) The registry will now look like this. (See screenshot below)

H) Go to step 7.
6. To Remove System Properties
A) In the left pane, right click on System Properties and click on Delete. (See screenshot above)
B) Click on Yes to confirm deletion.
7. Close regedit.
That's it,
Shawn
Related Tutorials
- How to Expand the Context (Shortcuts) Menu in Vista
- How to Customize the Context Menu for the Start Menu in Vista
- How to Customize the Send To Context Menu in Vista
- How to Customize the Recycle Bin Context Menu in Vista
- How to Add Encrypt and Decrypt to the Context Menu in Vista
- How to Add and Remove a New Menu Item in Vista
- How to Add Take Ownership to the Context Menu in Vista
- How to Add or Remove Turn Aero On or Off from the Vista Context Menu
- How to Add Flip 3D to the Context Menu in Vista
- How to Restore or Remove New from the Context Menu in Vista
- How to Enable or Disable the Context Menu in Vista
- How to Remove or Show Drives in the Vista and Windows 7 "Send To" Context Menu
- How to Add View and Print File Directory to the Context Menu in Vista
- How to Add COPY TO FOLDER and MOVE TO FOLDER to the Context Menu in Vista
- How to Add or Remove Copy as Path from the Vista Context Menu
- How to Add or Remove Send To from the Vista Context Menu
- How to Restore or Remove "Restore Previous Versions" from the Vista Context Menu
Attachments
Last edited: