How to Use the Snipping Tool in Vista and Windows 7
This tutorial will show you how to use the 'Snipping Tool' to select an area of an on-screen image for use in other programs and applications.
1) In this tutorial, I will show you how to use the 'Vista Snipping Tool' to select an area of an on-screen image for use in other programs and applications. The image I have chosen for this example is found in the 'Sample Pictures' folder, and is the 'Toco Toucan'. The first image shows the full picture, and this example will show you how to select the Toucan from the picture. For details on how this image was inserted into the tutorial, refer to the footnote at the end.

2) With the screen showing the image from which you wish to make your selection, you need to invoke the 'Snipping Tool'. To do this, click the start orb and type 'Snipping Tool' into the search box.
NOTE: The Snipping Tool is not available in the Vista Home Basic edition. This is a part of the Tablet PC Optional Components in Vista only, and is turned on in Windows Features by default in Vista.
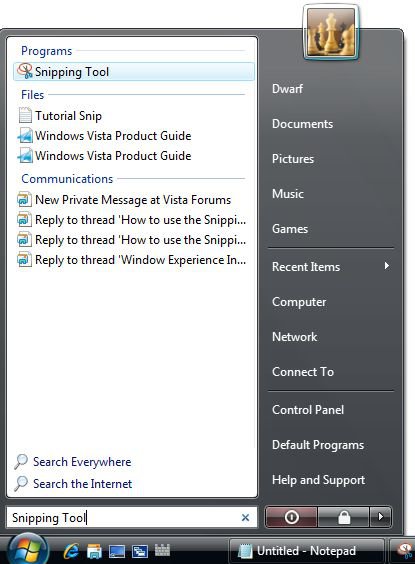
3) In the 'Programs' section of the results panel, click this item and the initial tool will appear. Note that you can move this tool around the screen so that it does not obstruct the area you are interested in. Note also that the rest of the screen is dimmed. This image shows the tool over a section of the 'Waterfall', another image from the 'Sample Pictures' folder. I chose that image here because I felt that the 'Toco Toucan' image was too green to show the effect of the dimmed screen.
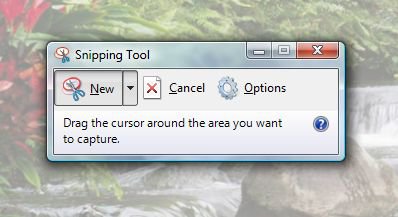
4) You may change the type of snip by clicking on the downward pointing arrow on the 'New' button. Here I have selected the 'Rectangular Snip'.
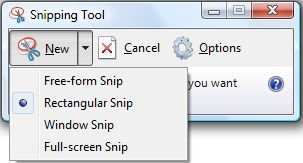
If you want to take a screen capture of just a single window, use the the Window Snip selection to automatically pick a window to get snipped.

5) The default setting for the 'Snipping Tool' is to have a red band around the snip (you can change the colour of this band if you wish). I have turned this option off for this tutorial, but to illustrate this option, the next 2 images show this effect, firstly enabled and secondly disabled. Note that it still appears whilst you are selecting the snip so that you know what you are selecting. This option is found under 'Snipping Tools Options (click the 'Options' button to open this dialogue box. The option you require is 'Show selection ink after snips are captured'.
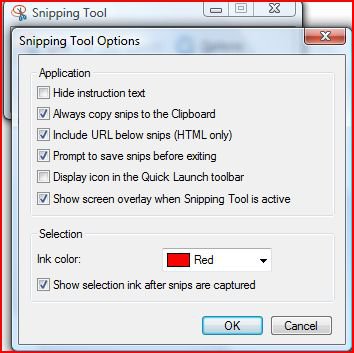
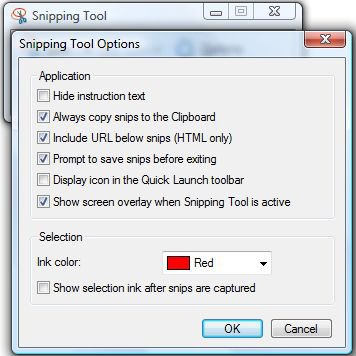
6) Next, click on the image and drag the red band so that it encompasses the section of the image that you are interested in. Note that this portion of the image will be highlighted. When you release the mouse button, the following screen will appear.
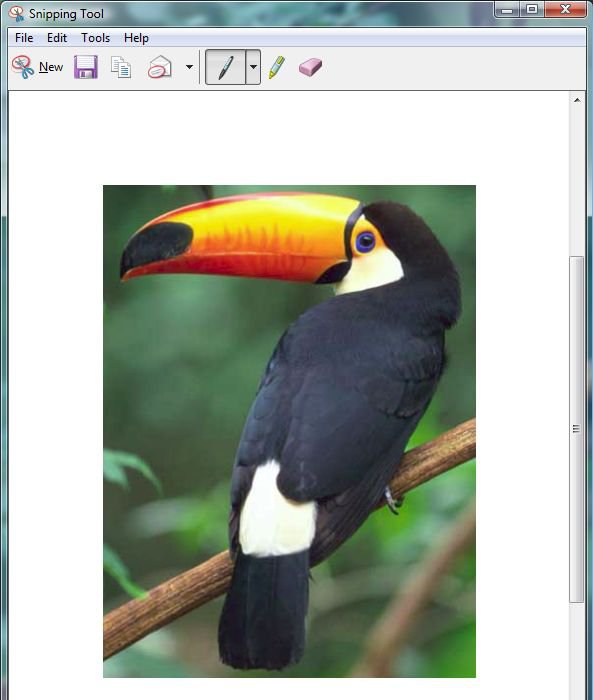
7) Click on the save icon (the picture of a floppy disk) and select a file name and location for the file. You can then use the image created for whatever purpose you require. The rest of this tutorial will show you how to attach this image to a post for submitting to the forums.
8) When you submit a post to the forums, you do so by entering the text of your post into the message box.
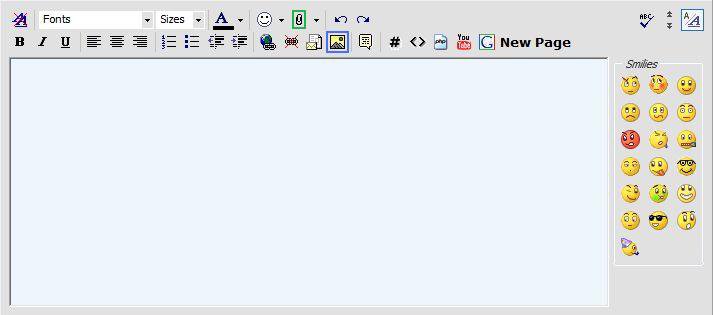
9) If you look at the toolbar in this image, you will see an icon in the form of a paperclip (highlighted in green above). It is this option that you select in order to manage images. This is the initial display of this screen before images are added.
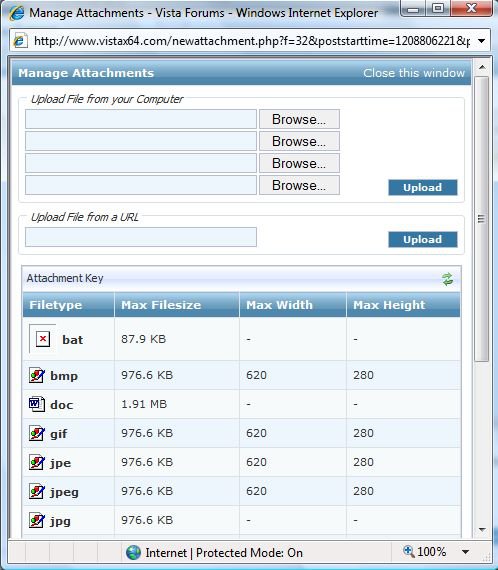
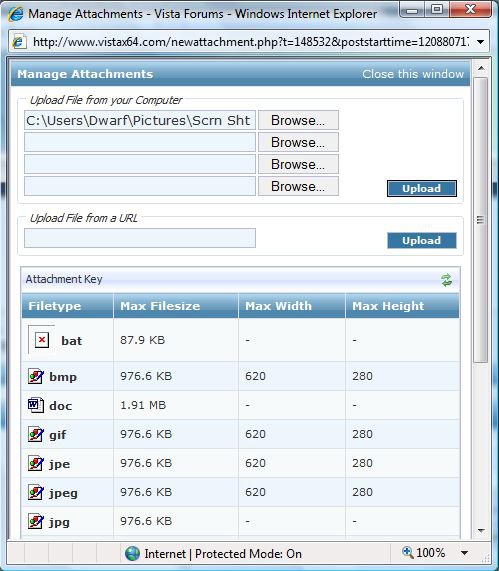
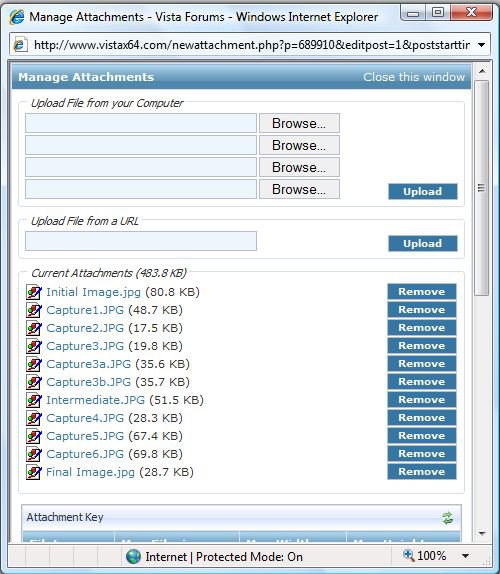
10) In the section 'Upload File from your Computer', click 'Browse...' next to the first available slot and locate the required file. This file will appear in the address box as illustrated by the first of the next two images. Although this example shows just a single file, you can browse and locate up to 4 files at a time. When you have done, click 'Upload' to transfer these files to the forum servers, the result of which is indicated in the second of these two images. You can then repeat the procedure to add more files if needed. Obviously, your list of files will be different to mine.
11) When you have finished uploading files, click on 'Close this window' to return to the main message box.
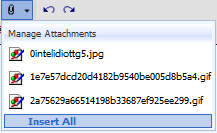
12) When you wish to insert an uploaded image into your post, click on the paperclip again and select the required image from the drop down list. The image will be inserted at the current cursor position, and will be shown as
""
where 'XXXX' is a unique reference number allocated to your image by the forum servers. As this tutorial is about selecting the Toucan, the final image shows the result.

If you upload a lot of attachments and want to them to all appear in a row, then you can use the Insert All link at the bottom of the attachments
FOOTNOTE: This section shows how the original image was inserted in to this Tutorial.
13) Upload your image files as described above. Notice the list of 'Current Attachments' in the 2nd image at step 10. Right-click on the required attachment and select 'Copy Shortcut' from the menu that appears.
14) Referring to the image in step 8, click on the 'Insert Image' icon (highlighted in blue). The following dialogue box appears.
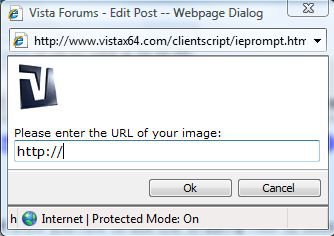
15) Delete the contents of the text box ("http://"), and in its place paste the shortcut created in step 13.
16) When you wish to insert this image into your post, it is a similar procedure to inserting normal attachments as described in step 12, except that you click on the 'Insert Image' icon instead. Again, the image will be inserted at the current cursor position, and will be shown as "
17) This resizes the image so that it fits the post, but when the image is clicked on the full image is shown. Click and hold to move the image, click and release to return to the post.
Attachments
Last edited by a moderator:

