How to Use Windows Remote Assistance in Vista
Windows Remote Assistance is a convenient way for someone you trust to connect to your computer and walk you through a solution. To help ensure that only people you invite can connect to your computer using Remote Assistance, all sessions are encrypted and password protected.
For more information, see:
For more information, see:
- If the person you want to help has XP and you use Vista, then Remote Assistance should work.
- If you have Vista and the person that is going to remote assist control you has XP, then Remote Assistance will not work.
 STEP ONE
1. For how, see: How to Enable or Disable Windows Remote Assistance in Vista
 STEP TWO
1. Open the Start Menu.
2. Click on All Programs, Maintenance, and Windows Remote Assistance.
NOTE: The exe file location is at: C:\Windows\System32\msra.exe.
A) Go to step 3.
OR
2. Type msra.exe in the white line (Start Search) area and press Enter.
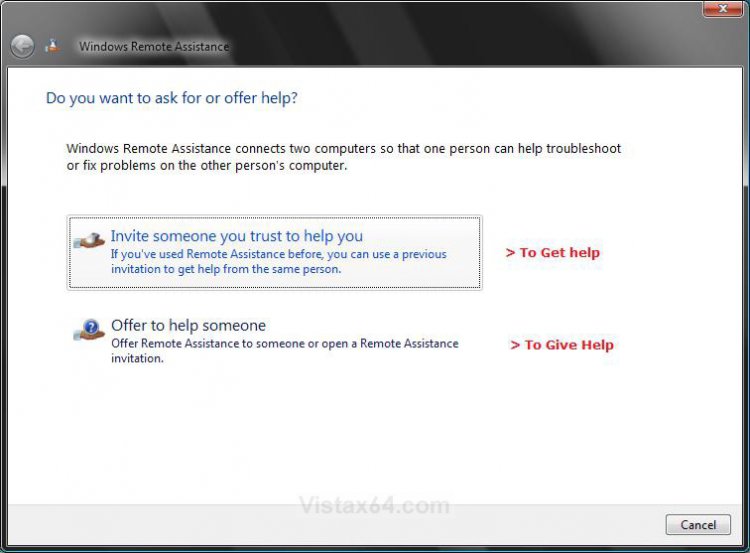
3. Click on the option you want to do. (See screenshot below)
NOTE: See OPTION ONE (Step 4) and OPTION TWO (Step 6) below for details on each.
 Option One
4. Click on Offer to help someone. (See screenshot above)
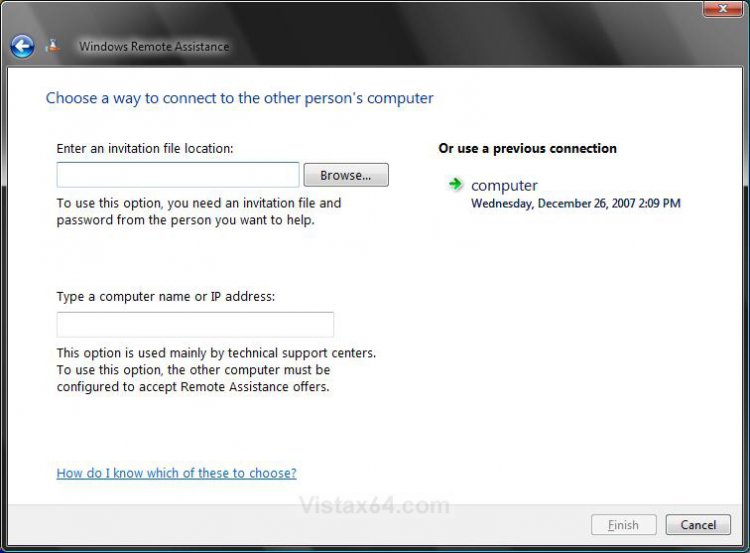
A) By Using a Invitation File - Click Browse and navigate to the invitation file that you were sent from the person's computer you want to do a Remote Assistance with. (See screenshot below)
NOTE: This would be the invitation file from OPTION TWO steps 8 or 9 below.
B) By Using a Computer Name or IP Address - Type in the computer name if your own a Domain, otherwise type in the IP address of the computer you want to do a Remote Assistance with. (See screenshot below)
C) Click on Finish.
D) By a Previous Connection - Just click on the location to start the connection.
5. Go to step 10.
 Option Two
6. Click on Invite someone you trust to help you. (See screenshot below step 3)
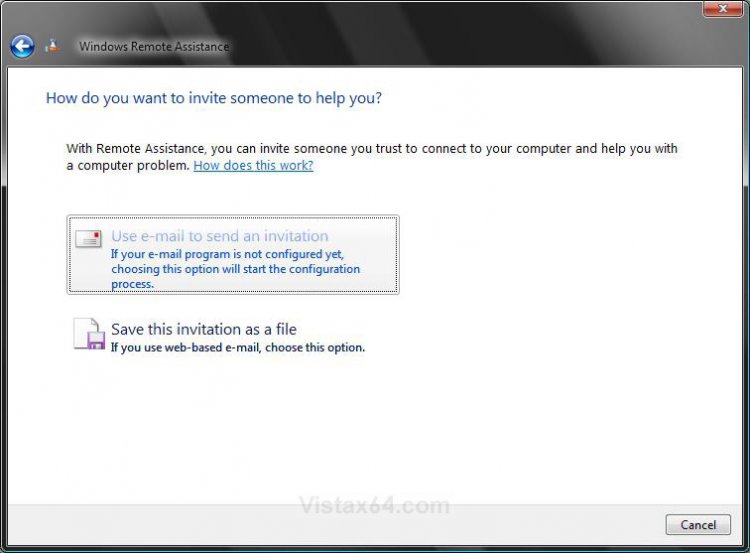
7. Choose to send a Email invitation or a File invitation. (See screenshot below)
NOTE: See steps 8 and 9 below for details on each.
8. To Send a Email Remote Assistance Invitation -
NOTE: If you do not have email, then use step 9 below for a file invitation.
A) Click on Use e-mail to send an invitation. (See screenshot above)
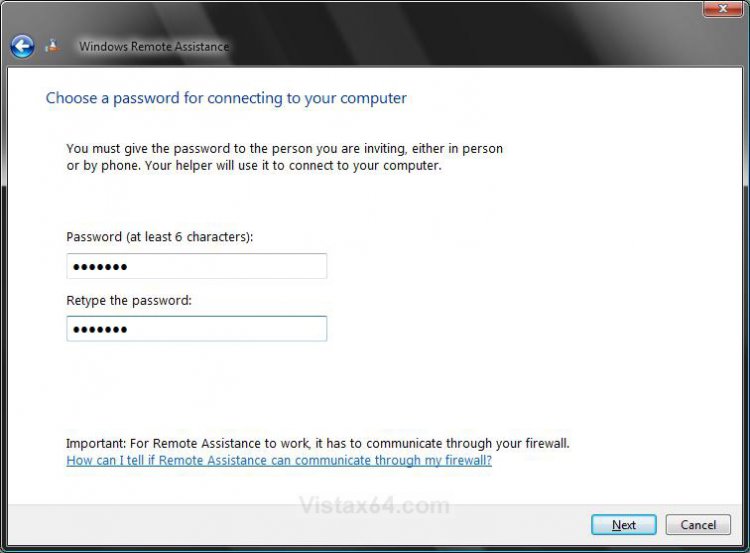
B) Type in a password and again to confirm it. (See screenshot below)
NOTE: You will have to give the person you are sending this email to this password manually for them to be able to use it to do a remote assistance connection with this computer in step 11 . It will not be included in the email.
C) Click on Next.
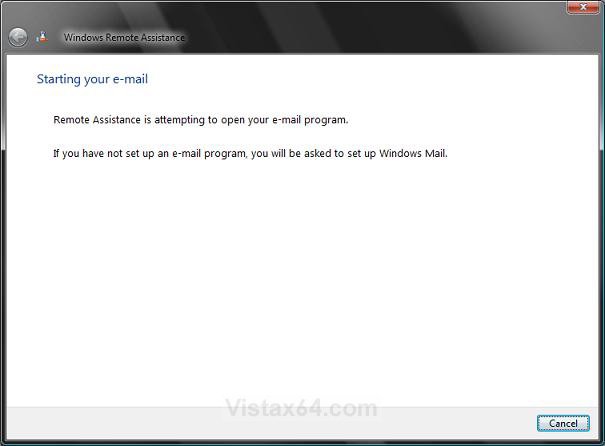
D) You will now see this as it prepares the email. (See screenshot below)
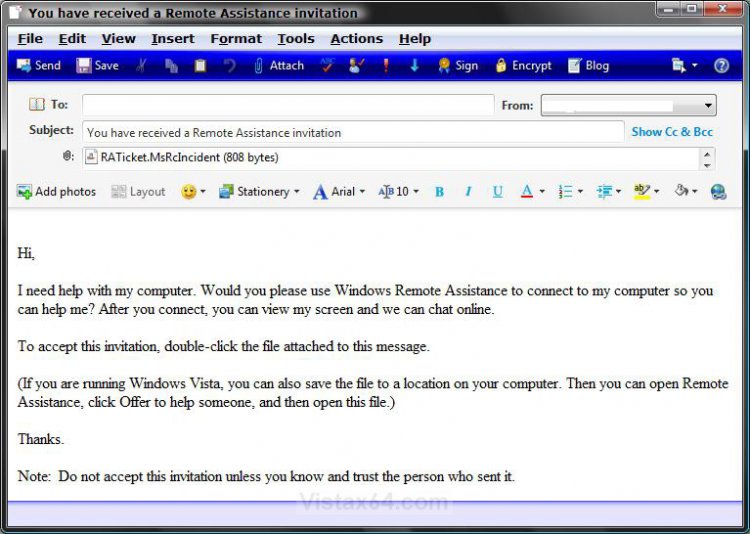
E) Send the email to the person you want for them to be able to do have a remote assistance connection with you. (See screenshot below)
NOTE: When they recieve the email, they just need to click on the attached file and enter the password. See step 11.
F) Go to step 10.
9. To Send a File Invitation -
NOTE: This is the same as the attached email file in step 8, except you can send this file to the person you want to do be able to have a remote assistance connection any way you want.
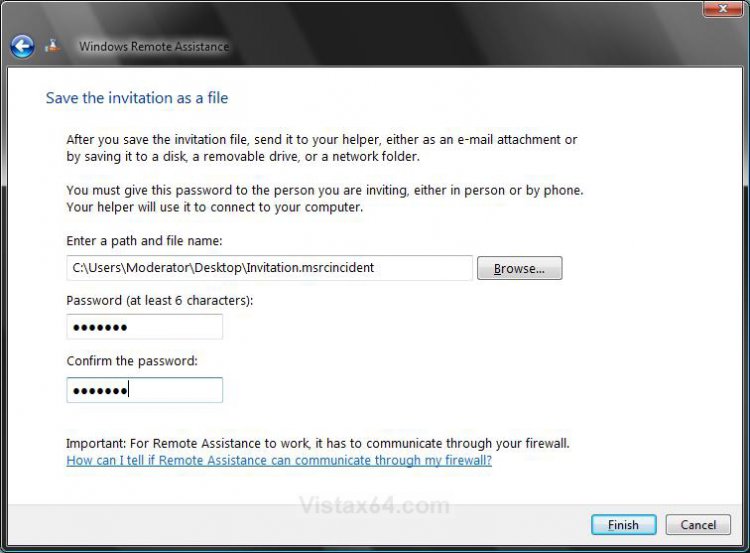
A) Click on Save this invitation as a file. (See screenshot below step 7)
B) Type in a location to save the invitation file to. (See screenshot below)
C Type in a password and again to confirm it.
NOTE: You will have to give the person you are sending this file to this password manually for them to be able to use it to do a remote assistance connection with this computer in step 11. It will not be included in the email.
D) Click on Finish.
10. You will now see the Windows Remote Assistance dialog while you wait for your invitee to connect. (See screenshot below)
NOTE: You must keep Windows Remote Assistance open or your invitee will be unable to connect.
 STEP THREE
NOTE: This is after you received the email invitation with an attached file (Step 8) or file invitation (step 9) and clicked on the file.
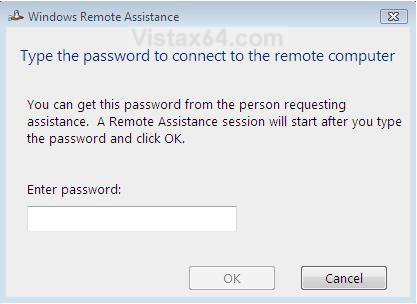
11. Type in the password given to you. (See screenshot below)
NOTE: Remember that the password is not included in the email or file, so you must manually communicate the password to the invited person.
A) Click on OK.
That's it,
Shawn
Attachments
Last edited:

