How to Restore TrustedInstaller as Owner of a File in Vista and Windows 7
This will show you how to restore TrustedInstaller back as the owner for a protected system file, folder, drive (usually the C: drive), or registry key that you have Taken Ownership of with your user account.
There are a few essential protected system resources (system files, folders, and registry keys) that are installed as part of Vista and Windows 7. To help prevent a application and operating system failure, these resources are protected using Windows File Protection (WFP) in such way that applications or users cannot modify these resources by default. The way this protection is implemented is by setting an Access Control List (ACL) on these resources only to allow the TrustedInstaller user to modify them. Not only can a Administrator (elevated or not) account cannot modify them, but neither can the System.
- It is best not to Taken Ownership of these protected system resources to prevent them from being changed and less secure. If you do, then be sure to change the Owner of the file back to TrustedInstaller below to secure the file again.
- Not all files are set with TrustedInstaller as the Owner, so do not change random files ownership to this. If you do, your user account will not be able to modify these files until you have Taken Ownership of them again.
Here's How:
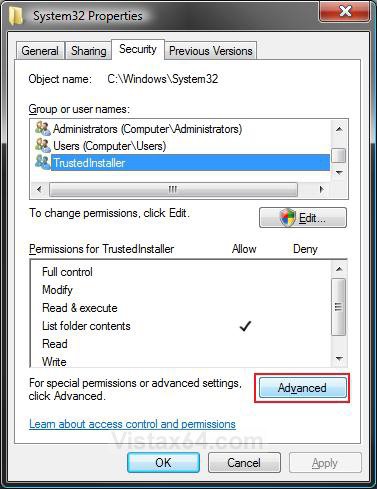
1. Right click on the file, folder, drive, or registry key and click on Properties.
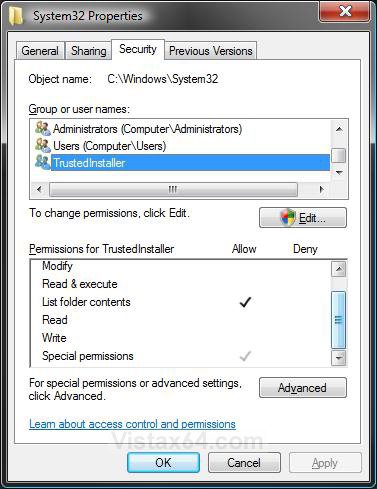
2. Click on the Security tab and click on the Advanced button. (See screenshot below)
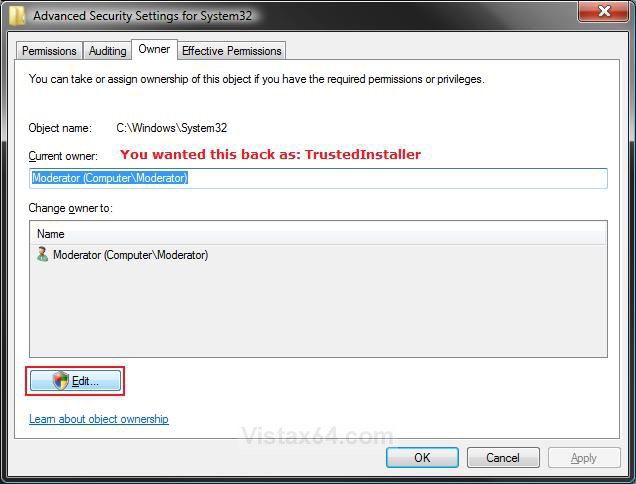
3. Click on the Owner tab and click on the Edit button. (See screenshot below)
NOTE: If the Current owner is listed as TrustedInstaller, then you can stop here. The file's owner is already set as TrustedInstaller.
4. If prompted by UAC, then click on Continue (Vista) or on Yes (Windows 7).
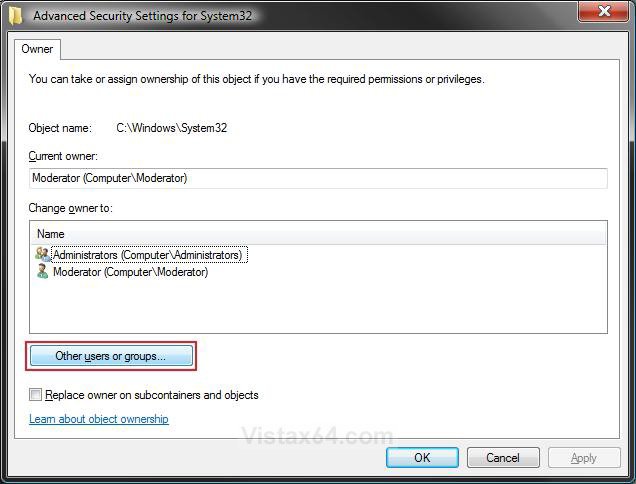
5. Click on the Other users or groups button. (See screenshot below)
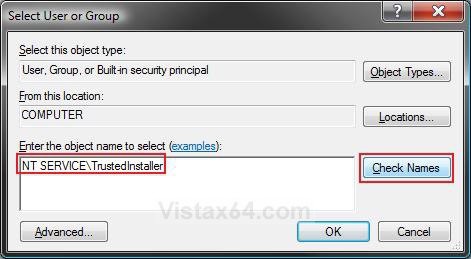
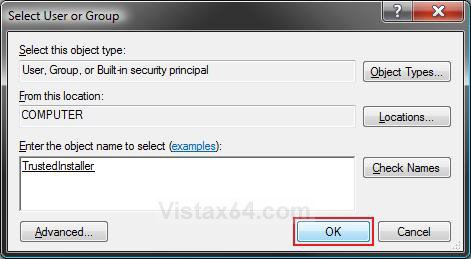
6. Type in the object name of NT SERVICE\TrustedInstaller and click on the Check Names button. (See screenshot below)
7. Click on OK. (See screenshot below)
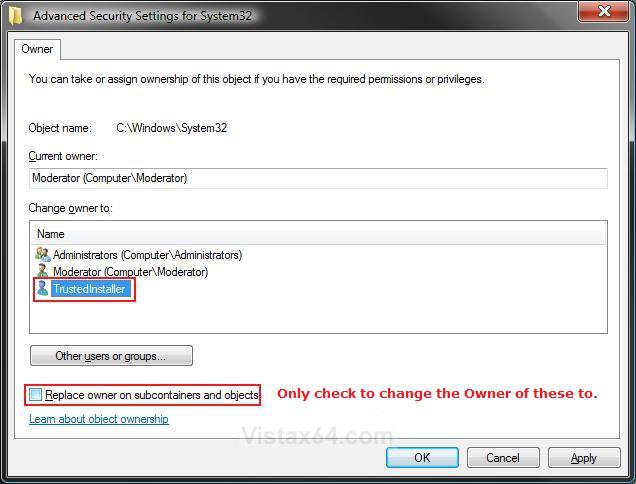
8. Click on TrustedInstaller to highlight it. (See screenshot below step 9)
NOTE: If you also wanted to change the owner for all subfolders and files to, then check the Replace owner on subcontainers and objects box. Leave this unchecked for a drive. This option will not be here if you are doing this for a just a file from step 1.
9. Click on OK. (See screenshot below)
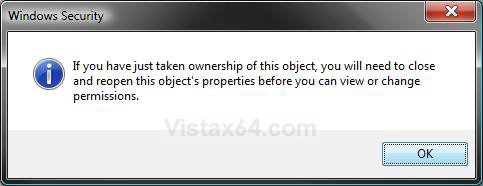
10. Click on OK for the window that just popped up. (See screenshot below)
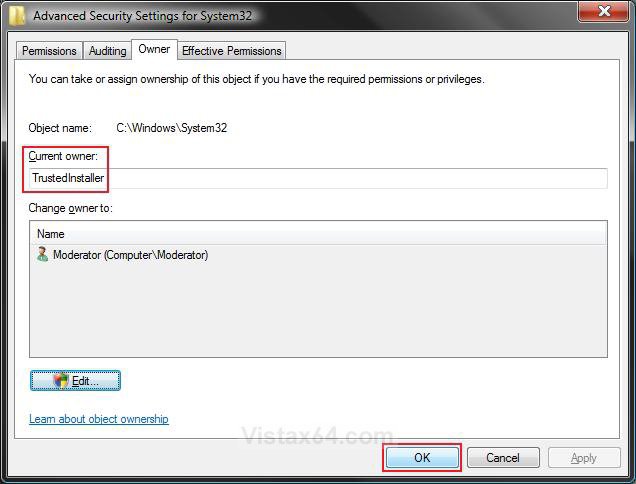
11. Click on OK. (See screenshot below)
NOTE: Notice that the Current owner is now TrustedInstaller again.
12. Click on OK. (See screenshot below)
NOTE: If you had taken ownership of this item, then you may also want to change the permission level back to the default Allow settings first for the account that you took ownership with to prevent changes to this item again.
That's it,
Shawn
Related Tutorials
- How to Add Take Ownership to the Context Menu in Vista
- How to Take Ownership of a Item in Vista
- How to Perform a Repair Installation for Vista
- How to Repair and Verify the Integrity of Vista System Files with System File Checker
- How to Do a System Restore in Vista
- How to Allow or Deny Permissions to Users and Groups
Attachments
Last edited by a moderator:

